Chibitronics wants to make coding and electronics accessible to everyone, and they especially want to reach artistic and creative students who think electronics and coding are something they can’t figure out. To that end, they have created two kits, Chibi Lights LED Circuit Stickers STEM Starter Kit and the Love to Code Creative Coding Kit. Chibi Lights is an introductory kit, while Love to Code takes concepts much further.
Both kits are designed around a book-style format. I want to start by explaining the smaller Chibi Lights Kit, since Love to Code is a greatly expanded version of it.
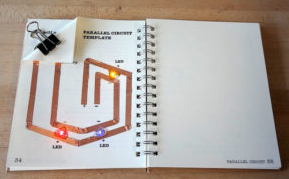
In Chibi Lights, students attach strips of copper tape, batteries, and LEDs to pages of the book to learn how circuits work. This is basic electronics with no coding involved. Students learn to create simple on and off switches by folding the corner of a page in the book in a way that breaks or connects a circuit. They create both series and parallel circuits, adding different colored LED lights to create different effects. Black conductive plastic is also used to create a pressure sensor.
 The process is super simple since the concepts are taught using pre-drawn lines where copper tape, LEDs and the battery will go on the 5.5" x 4.5" pages. Students then have opportunities to create their own circuits. Blank pages or pages with a few simple drawings follow many of the circuit-building pages. The LED lights show through, and students are given opportunities to draw scenes incorporating the lights. The simplicity and effectiveness of the kit are amazing. The best way to see how this works is to watch the brief demo video on their homepage.
While the box says that Chibi Lights is for ages 14 and up, I think most seven- and eight-year-olds will be able to create these circuits and understand how they work. I love that it is so simply presented and makes it easy to create a working circuit so quickly.
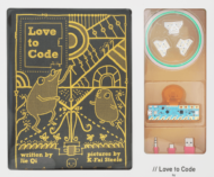
The Love to Code Creative Coding Kit builds upon the same ideas—using copper tape, batteries, and LEDs, but it goes much further, connecting electronic circuits to a circuit board and teaching actual coding with either block code or text code. Students will need to connect to a computer to do the coding. This is a unique combination of arts and crafts with electronics and computer programming.
This kit is centered around an attractive, artistically-designed, 7” x 10” binder with larger pages and significantly more of them than Chibi Lights. Love to Code uses a programmable Chibi Chip (a circuit board built on a clip that attaches to the book) and a USB battery pack that is permanently attached to the binder. Students can power their circuit board either from the battery pack or from a computer. A cable connects the Chibi Chip to both a USB port and an audio jack on the computer or device used for programming.
There are two versions of the book that goes in the binder for this kit—one teaches Microsoft MakeCode™ block programming while the other teaches text coding with a Love to Code text programming editor (an Arduino-based, beginner-friendly coding language). Both books come with the kit, and both programming options require students to access free online sites where they will do the actual coding. Following instructions in the binder, they will create their code then download it to their Chibi Chip before connecting the Chip to the circuits on their binder pages.
The Microsoft MakeCode approach is a much easier starting place for beginners than Love to Code's text programming editor since it uses preprogrammed blocks of code that students arrange to create programs. If they wish, students can start with the block programming, then go back and try to create the same projects with text coding in the alternate book. Those with some familiarity with programming can start with the text version. Aside from the form of programming, projects and lessons are the same in both books.

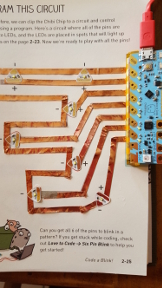
The photo here shows a completed circuit with the chip attached. There are a number of triangular LEDs on this circuit that will light up. The second photo shows the previous page which can overlay the circuit. Students can draw scenes in the windows that will be lit up by the LEDs. This approach is used throughout the book, and students can add the artistic elements or not as they wish. There’s an entire “switch craft gallery” section with cutouts and instructions for making creative switches such as a flower wind sensor—blow on the flower to activate a switch.
 The book includes debugging tips to help students determine the problem if a project doesn’t work correctly. These are included in the lessons as well as in a section at the back of the book. There are also short demonstration videos on the website that might be helpful. If students get stuck, they can email Chibitronics for help.
Like the Chibi Lights Kit, Love to Code is supposed to be for older students, but it is presented so well that my eight-year-old granddaughter could complete the projects using block coding and grasp the concept of how to manipulate the blocks and make changes on each block to create different effects. We have only completed the first two of the four sections of the book over a few lengthy sessions. And there’s lots more to do, especially if students get creative pursuing their own project ideas. So there are many hours of activity in this kit.
I thought Chibi Lights was great, but Love to Code incorporates much of what is in Chibi Lights and adds so much more that I recommend getting the larger kit.


